Getting Started
Hat Base
Earflaps
Eyes
Ears, Tongue and Nose
You have finished crocheting the Gir Hat Pattern, congratulations!
All that is left is to assemble the hat.
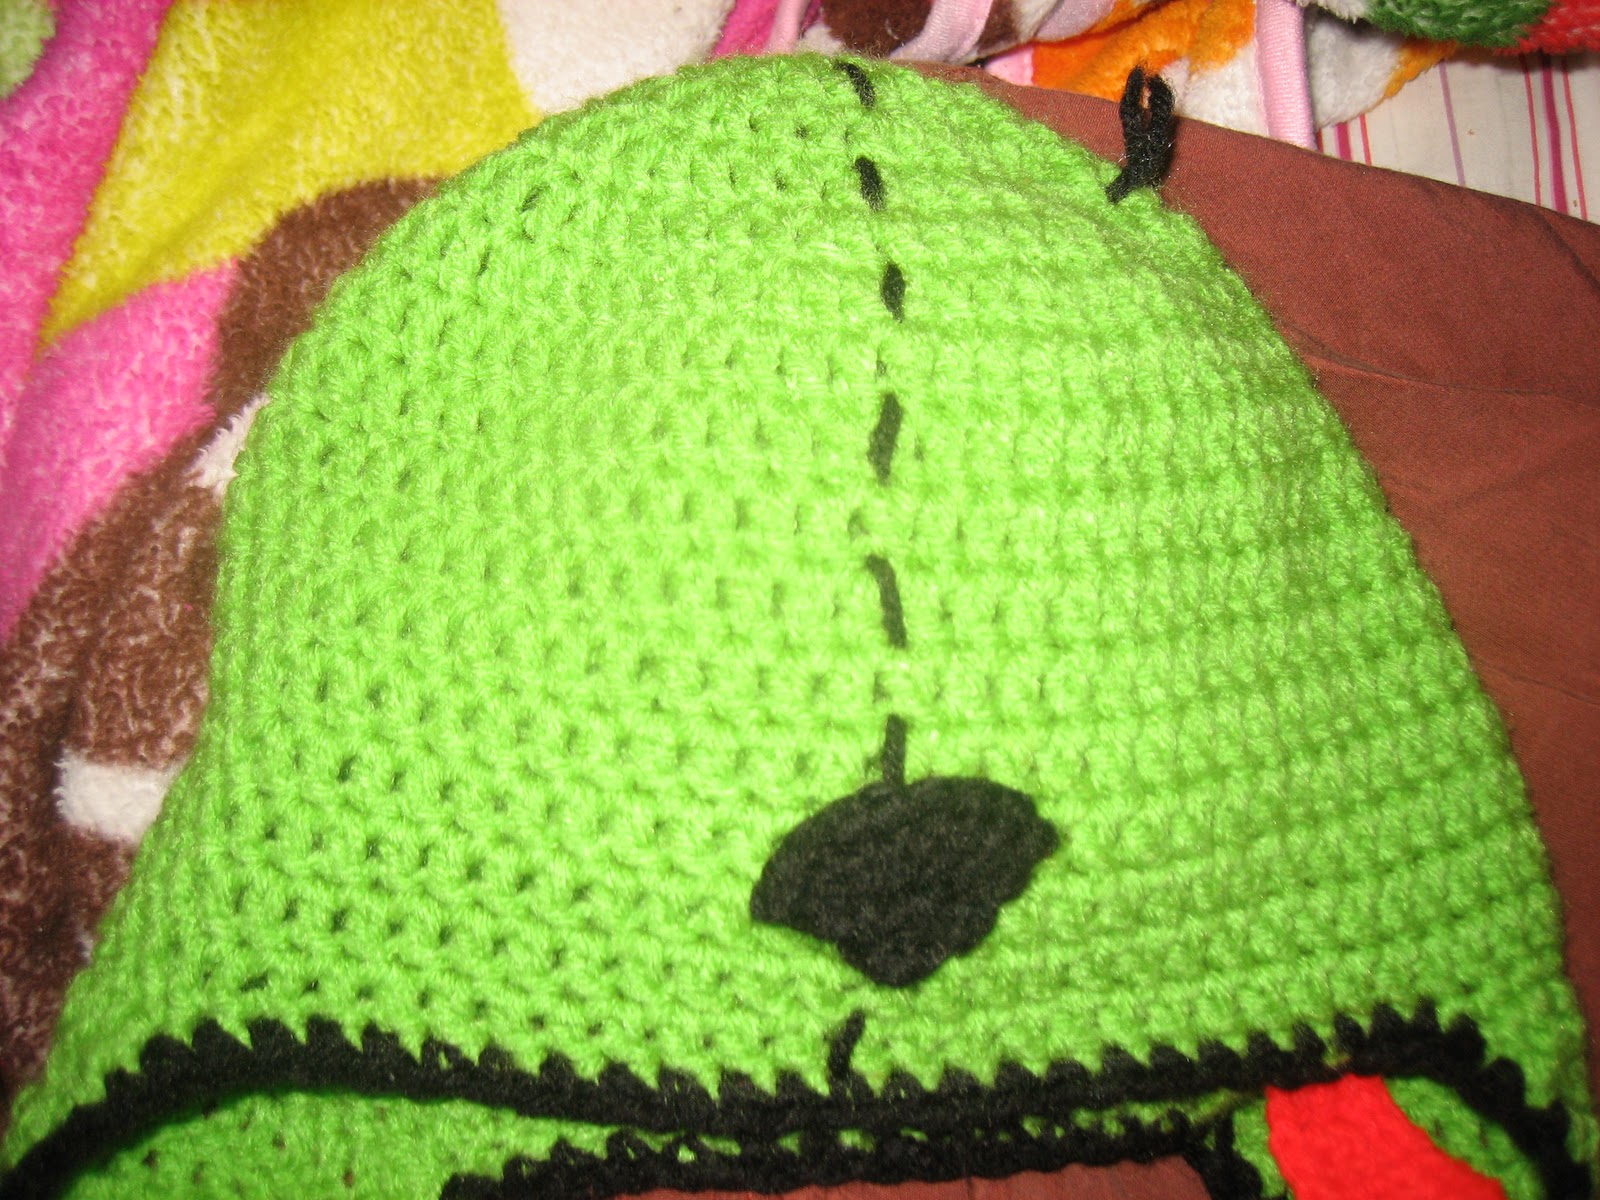
Zipper Seam.
At the middle of the front of the hat (count in to stitch 12) attach black yarn. Weave the yarn over and under alternating rows of dc in a straight line up the center of the hat, cross over the peak of the hat (the magic ring/ starting point) and continue down the back of the hat till you reach the boarder of the opposite side. Do not pull this thread too tightly or is will cause the hat to pucker. Tie of the yarn and weave the ends into the boarder.
 | ||
| Front view of zipper seam |
 |
| Top view of zipper seam |
 |
| Back view of zipper seam |
Attach Nose to Hat Base.
Attach the nose along the black seam in the middle of the front of the hat. The nose should be centered along the seam with the bottom point lined up with the top of round 16 on the hat base. Stitch around the boarder of the nose with black yarn so that is blends in. Tie off the yarn and weave in ends.
 |
| Front view Nose Attached |
Place the small end of the tongue (row 10) along the inside of the boarder of the hat base near the corner where it meets the earflap on the front of the hat (the front has a wider distance between the earflaps). Sew the tongue to the hat with black yarn. Tie of the yarn at either ends and weave into the boarder.
 |
| Front of hat with tongue |
 |
| Tongue attached |
Attach Ears to Hat Base.
Attach the ears to the hat along the shortest boarder of the ear (row 24). Position ears on back of hat so that they are located equal distances from the "zipper seam" and appear to be symmetrical. While they can be placed anywhere you want, I placed mine so that the top of the row 24 was attached between rounds 4 and 5 on the hat base about 6 dc away from the seam. Then the ear was stitched on at an angle so that the bottom of the ear attachment was located between rows 6 and 7 and over about 8 dc from the mid line seam. Tie of yarn and weave in ends. Repeat for second ear.
 |
| Back of hat ear placement |
Attach Pupil to Eyeball.
Center the pupil on the eyeball and thread the ends of the left over yarn from the pupil through the spaces between the 1st and 2nd rounds on the eyeball. Continue to stitch all the way around the pupil till you get back to where you started. Tie of the yarn and weave in the ends. Repeat for second eye.
 |
| Stitching on pupil, view inside eyeball |
 |
| Stitching on pupil |
Attach Eyes to Hat Base
Stuff eye ball with enough fiberfill that it remains round when poked, but not so much that it is overflowing. Attach eyes so that they are placed symmetrically on either side of the zipper seam.
I placed the eyeballs so the top of the eyeball was along the bottom of round 5 and the bottom extended down to the top of round 12. Stitch around the base of the eyeball with white yarn. Tie off yarn and weave ends into base of eyeball. Repeat for second eye.
 |
| Stitching on 1st eye |
 |
| Eye placement |
 |
| Adding the second eye |
 |
| Both eyes attached |
Hoorary!!! Your Gir Hat is FINISHED!!!!

As you can see, I changed the ears a little from the original hat, but everything else is as similar as possible. I hope you have fun making gir and if you notice any mistakes in the pattern please let me know and I will fix them. Also, I have compiled all the previous instructions into a single PDF. I am not entirely sure how to upload it onto blogger, but if you want it I would be happy to e-mail it to you.
Good luck and happy hooking. :)


